Balance Test for Seniors at Home: A Gentle 5-Day Check
A balance test for seniors at home works best as a personal record, with no score attached. Four short stands at the kitchen counter, done the same way every few weeks, show you how your own steadiness changes. You compare yourself only with yourself.
What this home check is for
It's a way to notice change. You note what you managed on a single day, at your own counter, wearing your usual shoes. A few weeks later you do exactly the same thing and set the two records side by side.
There's no pass or fail. You won't find a good score, a bad score, or a "normal for your age" number anywhere in this post. Plenty of small things nudge the results up or down: a bad night, heavy legs, a stiff knee. That's expected.
If a stand ever feels too hard or not safe, sit down and leave it there. Mention it at your next doctor visit. A hard stand is simply useful to know about.
Safety first
Ask your doctor first if you've had a fall in the last year, get dizzy or unsteady often, had surgery recently, walk with a cane or walker, or are on heart or blood pressure medicine. Any dizziness, sharp pain, chest discomfort or trouble breathing means you stop and sit down.
Set up three things every time:
- The counter. Stand beside it with a hand on the edge. If you feel shaky, turn to face it and use both hands.
- A chair behind you. Sturdy, no wheels, a short step back and ready for you to sit.
- A helper nearby. A family member or friend who stays close on the side away from the counter.
A 5-day plan for your first balance test at home
Day 1: Set up your spot
Choose one place at the counter and use it every time. Put the chair a short step behind where you'll stand. Then ask someone to be your helper. Their job is to stay close, hold the timer and count out loud, which leaves your attention free for your body.
Pick one pair of flat shoes with a good grip and save them for every check. Keep a notebook and pen on the counter. That's all for today.
Day 2: Learn the four positions
No timer today. With your helper beside you, try each position for a few breaths so it starts to feel familiar.
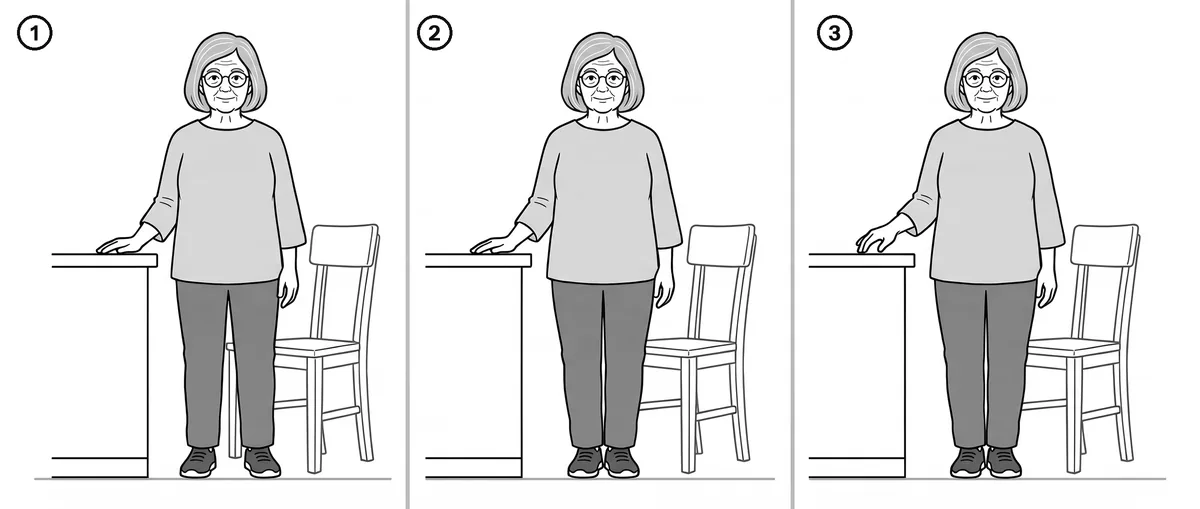
- Chair stand. Sit toward the front edge of the seat, feet flat and hip-width apart. Rise all the way up, then lower yourself back down with control. Set the chair with its back touching a wall or the counter first, so it stays put.
- Feet together. Fingertips on the counter, feet side by side and close enough to touch.
- Half-tandem. Move one foot slightly ahead, so the inner edge of the front foot sits level with the big toe of the back one.
- Tandem. One foot straight in front of the other, front heel against back toes. Keep your whole hand on the counter for this one.
Day 3: Take your first record
Do the four stands in order, from easiest to hardest. Take any rest you want between them.
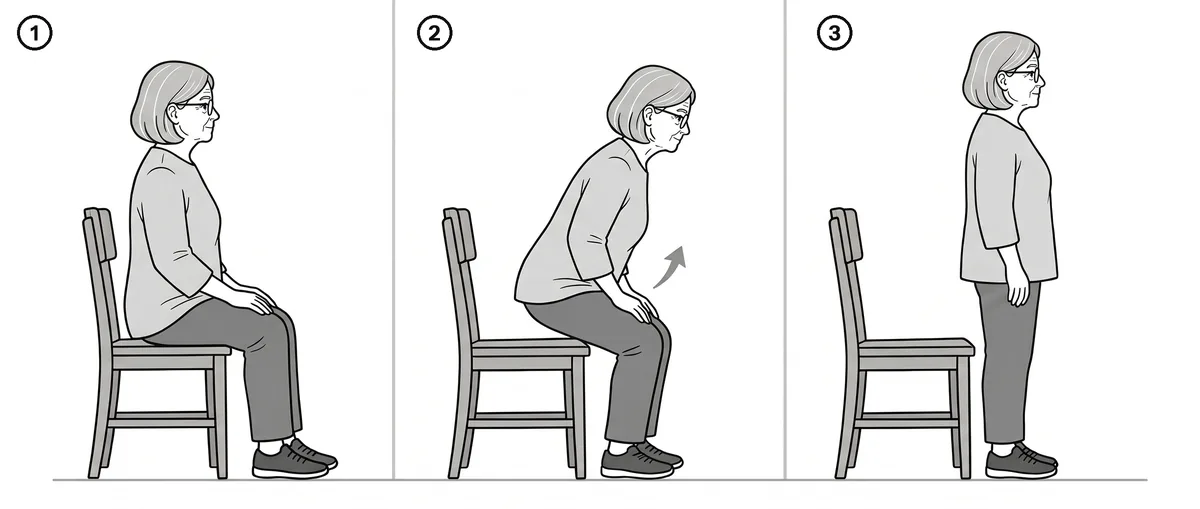
- Chair stand, 30 seconds. Fold your arms across your chest if that feels safe. Otherwise keep your hands on your thighs. Your helper says "Go" and counts every full stand. If time runs out while you're halfway up, that one counts too.
- Feet together, up to 10 seconds. Fix your eyes on one point straight ahead. Say "Start" once you feel settled.
- Half-tandem, up to 10 seconds. Note which foot was in front.
- Tandem, up to 10 seconds. It asks the most of the four, so your helper stays right beside you.
If your feet shift or your hand clutches the edge, your helper stops counting there. When a stand ends before 10 seconds, write down where it stopped and leave out the rest for today. You're finished for the day, and that's a perfectly good record.
Day 4: Finish your notes
Look over yesterday's numbers while the details are fresh. Next to each one, add:
- how you held the counter (fingertips, whole hand or both hands), or where your arms were for the chair stand
- which foot was in front for the last two stands
- a short note on the day, such as "slept badly" or "new shoes"
Write the date and the time of day at the top. After that, rest, or do a few gentle balance exercises if you feel like moving.
Day 5: Plan your next check
Mark a day about two weeks away on the calendar. Aim for the same time of day, since morning legs and evening legs can feel quite different. Keep the spot, the shoes and the helper the same as well. Small changes in setup make two records harder to compare.
How to continue
Between checks, keep practicing gently. The free starter routine is an easy daily base. Turning around is a common wobble moment at home, so the small-step turn is worth adding once standing feels steady.
Tai Chi Walking for Balance builds a six-week program around this check. It repeats the four stands on Day 15 and Day 42, and its record page keeps every column in one place. Later in the plan, the same stands return as practice moves.
Your record can go with you to the doctor, too. They can look at the numbers with you and say what they mean for you.
Your next step: today, choose your spot at the counter and ask someone to be your helper.
Questions people ask
Is a home balance check the same as a medical test?
No. It's a note of how a few stands went at your own counter on a single day, and it does not diagnose anything. Your doctor knows your health and can tell you what your numbers mean for you.
What is a good result for my age?
This check has no target number and no age chart. Compare each record only with your own earlier ones, and expect ups and downs from tired legs, poor sleep or new shoes.
How often should I repeat the check?
Every few weeks is plenty. Tai Chi Walking for Balance repeats it after two weeks of practice and again at six weeks, at roughly the same hour.
Keep reading
- Standing Balance Exercises for Seniors: A 7-Day Plan
- How to Turn Without Losing Balance: Small-Step Turns
- Walking Balance Exercises for Seniors: 3 Tai Chi Walks
- How to Stand on One Leg Safely at the Kitchen Counter
- Balance Exercises for Seniors at Home (With Pictures)
- About the book: Tai Chi Walking for Balance